|
I was inspired to make this because of the bow Melanie Martinez wears in her music video; "Carousel".
HERE'S WHAT CHU NEED: - 1 1/2 feet by 1 feet (ish. You can decide these measurements) - Wire - Pliers - Headband - White paint - Hot Glue - Needle and thread (optional) - Small strip of fabric (depending on how big your bow is) HERE'S HOW U DO IT: 1. Turn both pieces of fabric wrong side up and against each other so that the right sides are pressed against each other. 2. Sew the right, upper and left sides up together using either a needle and thread or a hot glue gun. 3. Snip off enough wire to outline your entire fabric rectangle but little enough to slip inside the fabric pocket that you've made. Flip the fabric pocket inside out. 4. Hot glue the wire in place. 5. Sew/hot glue the bottom of the fabric together. 6. Paint polka dots with white paint (optional) 7. Pinch entire fabric from the top and bottom to meet in the middle. 8. Hot glue pinch together. 9. Take leftover fabric and wrap it around pinch then hot glue in place. 10. Hot glue bottom of bow to headband. 11. Enjoy! When in doubt, just buy a Melanie bow. - Ray Ray
0 Comments
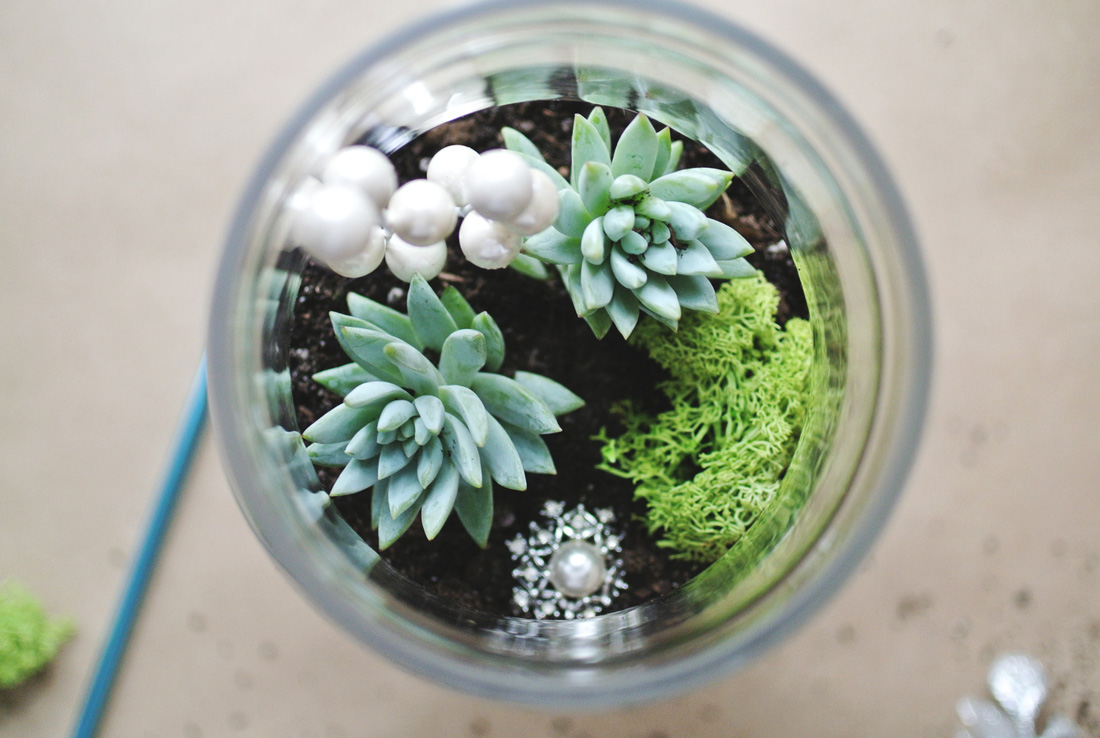
Want to have fancy room decor but you're too irresponsible to keep a plant alive? Then you've come to the right place. Here's how to make a fake terrarium. HEHERE'S WHATCHA NEEDHERE'S WHAT CHU NEED:
-Fake mini plants -large glass bowl -dirt -rocks/pebbles HERE'S HOW U DO IT: 1. Go to walmart and buy all the needed materials. The fake plants are hidden in the fake flowers/craft section. You're welcome, because boy those things are hard to find. 2. Get your glass bowl and fill it up with a little bit of dirt. 3. Get your rocks and arrange them on top. 4. Stick your fake plants inside. 5. DONE! When in doubt, buy fake flowers at the dollar store. -Ray Ray Alright, here's step two in reaching stack-bracelet goals. Leggo.
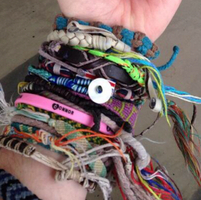
HERE'S WHAT CHU NEED: -3 or more different colors of bracelet yarn -scissors HERE'S HOW U DO IT: 1. Okay so first, measure a very loose circumference of your wrist, and then add an extra half of the circumference to your total length of string. Cut it here. 2. Tie all of the strings in a knot at the end. 3. Continue to tie knots in the string, exactly how you tied them all at the end, spacing them however you would like. 4. When you reach the end, check your circumference, and tie the bracelet. 5. Cut off any excess. 6. Flaunt your new bracelet goals. When in doubt, just spam Ricky Dillon about his bracelets. -Ray Ray This has been literally everywhere, and most popular during the summer. The first picture below is of Ricky Dillon's stack bracelets (I don't really watch his videos that often but his bracelets are goals I love them) and while I can't tell you how to remake that, I can tell you how to make the START of something beautiful like this. It all starts with the basics, and in this case- it's the fishtail bracelet. HERE'S WHAT CHU NEED:
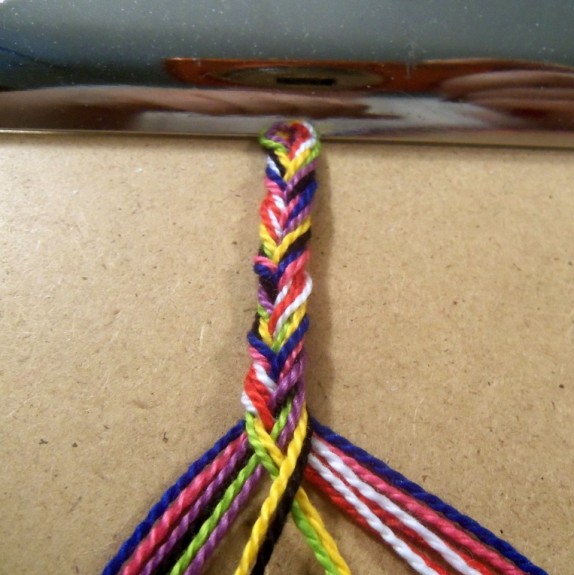
-Bracelet string -scissors HERE'S HOW U DO IT: 1. Hold your arm at a 90 degree angle and put one end of the string in your hand. 2. Bring the string down to your elbow and under it, then back to your hand. Basically looping it around your arm. Do this 1 time, and the last time, don't loop it, so it's 1 1/2 times instead. 2. Gather 3 colors or more (as long as its an even number. It doesn't have to be an even number, but it's easier if it is) and make doubles of each. 3. Tie all the strings up in a knot at the top. 4. Make sure the strings are aligned in order, as in 1 set of colors should be on one side, and the duplicates should be on the other side. 5. Fishtail braid these strings as you would your hair, but make sure the 2 strands you're crossing over are the same color. Continue to do this in the same order. 6. When you're done, tie it in a knot at the end and you're good! -Ray Ray Wanna have a spa day? Here's how to pamper your face and make it smell like bananas and cinnamon.
HERE'S WHAT CHU NEED: -1/2 a banana -2 tsp of coconut oil -1/2 tsp of cinnamon -1 egg white -4 ounce container -spoon -flat foundation brush -Blender (optional) HERE'S HOW U DO IT: 1. Gather all the ingredients in the container and mash them up with a spoon, or blend them if you have a blender. 2. Once thoroughly mixed, put in a container (or if its already in the container, just mix) 3. Use a flat foundation brush, or your fingers to put on your face. 4. Leave on your face till it's dry (45min +) This actually worked really well for me and cleared my acne. Not that I have a lot of it, per say, but it did clear what I had left. I recommend using it once a week at the least! -Ray Ray This DIY is do-able from your couch, which is always a good thing. Okay so vision boards and colorful custom collages have been floating around the internet for years now, and I've been itching to get my hands on a pretty one, or at least make one. I decided to make a collage board (finally) via PicMonkey (it's apparently all the youtube rage) using album covers of bands and singers I like, quotes from songs, and pictures from TV shows and other things I enjoy. So here's how to make one. 1. Go to www.picmonkey.com and click on the "Design" tab PicMonkey is a great collage making tool, and for editing pictures or making images. I used it for my blog logo, as well. 2. Scroll down to overlays Once you're on overlays, click the "your own" button and using this, you can upload any image to the board and piece it together as you please. When you're done, just click the save button so you can save it to your computer. 3. Enjoy! Go to your settings or right click the image to make it the background of your computer! I thought mine turned out pretty nice, so I also made it the background of my blog site. (I'm not as creative as I come off to be) I actually made two, one custom for me, and the other for my friend who really likes The Maze Runner. -Ray Ray 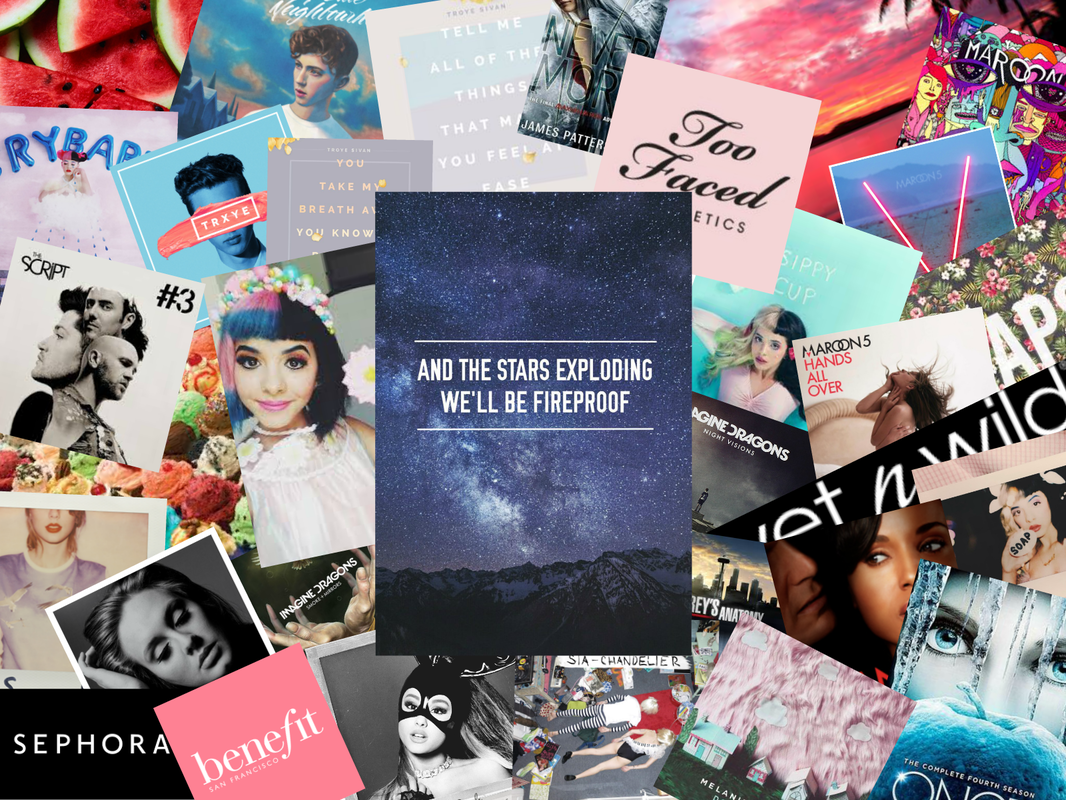 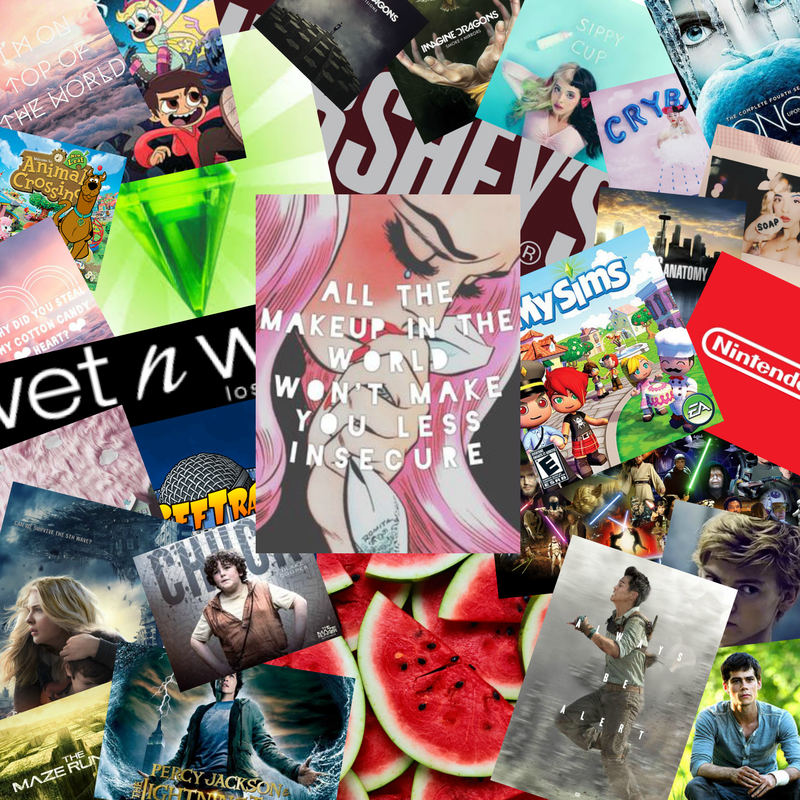 |
Archives
October 2016
|


 RSS Feed
